Building a brand
Product Photography Tips for Your Online Store (With a Phone)
Practical product photography tips for your online store using just a phone: natural light, backgrounds, angles, flat-lays vs on-model, and budget editing.
Tamm Team5 min read
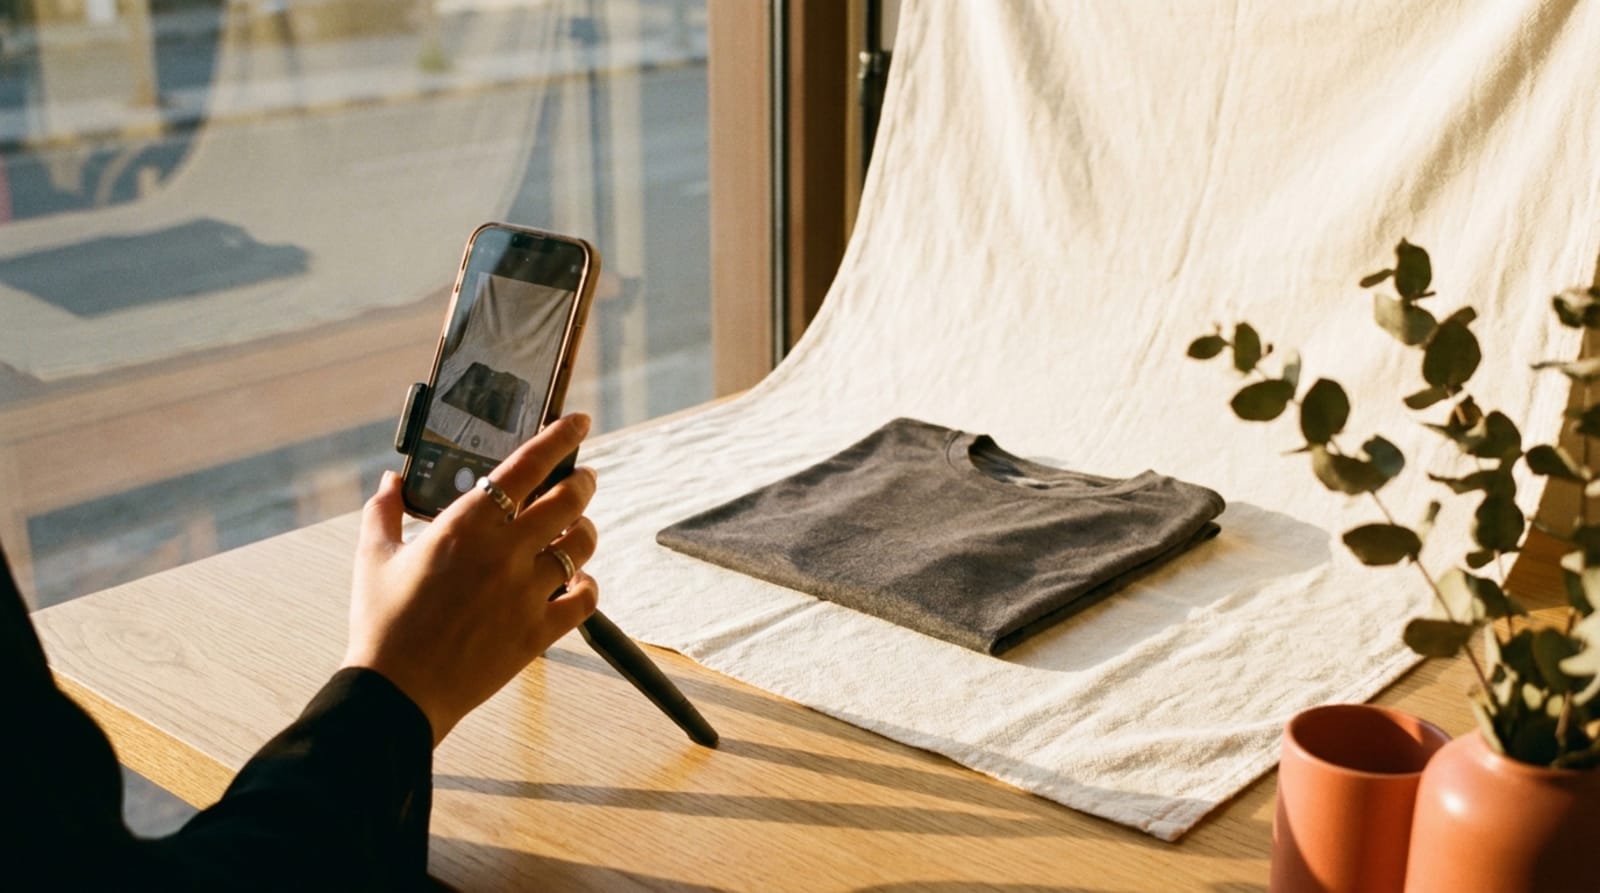
Product photography for your online store does not require an expensive camera. You can shoot professional photos with just a phone, and the secret is not the device but three simple things: natural window light, a clean background, and a steady phone. The photo is the first thing a customer sees and buys on, so it is your silent salesperson. This guide walks through, step by step, how to shoot your products on a budget with a phone: light, backgrounds, angles, flat-lays vs on-model, styling, editing basics, and consistency, with specific tips for shooting apparel and merch. The result is photos that sell, not just pretty pictures.
Start with light before anything else
Light is the most important element in a photo, and the cheapest. Natural daylight from a window beats any cheap artificial setup and is enough on its own for clean photos. Nail the basics first, then move to the details.
- Shoot next to a window. Place the product on a table near a large window so the light comes from the side, not from behind. Side light reveals texture and detail with depth.
- Avoid direct midday sun. Harsh light creates sharp shadows and glare. A slightly overcast day or the early morning hours give the soft light you want.
- Turn off the ceiling light. Mixing white window light with a yellow bulb ruins the product's true color. Commit to a single light source.
- Bounce the shadow. Place a simple white board or a sheet of cardboard on the dark side to soften the shadow and balance the exposure.
Set your background and angle
A clean background makes the product the hero of the frame. You do not need a studio: a white cardboard sheet or a neutral cotton cloth near the window is enough.
- Pick a neutral, fixed background. White, cream, or light gray lifts the product without competing with it. What matters most is using the same background for every product.
- Shoot at the product's level. Bring the phone down to the height of the product instead of shooting from above at a tilt. This gives correct proportions and a realistic feel.
- Vary the three angles. A straight-on shot for the catalog, a 45-degree angle for depth, and a close-up for detail, print, and fabric.
- Steady the phone. Use a small tripod or prop it on a stack of books. Stability prevents shake and keeps the same distance across every shot.
Flat-lays vs on-model
The two methods serve different purposes, and the smart move is to combine them for each product. A flat-lay is the product shot flat from above, and on-model is showing it worn on a person.
- Use flat-lays for detail. Lay the piece flat, smooth the wrinkles, and shoot straight down. Ideal for showing print, color, and cut clearly, and easy to keep consistent.
- Use on-model for fit and feel. Wearing the piece shows how it actually looks on the body and reduces returns, because the customer understands the fit and length. If you are testing a design before production, see the difference in mockups vs samples.

Style and bring the frame to life
- Add simple styling elements. A plant, an accessory, or a wood surface adds context and life, but never let it steal attention from the product. One or two elements are enough.
- Tell a use story. Shoot the product in its natural moment: the mug on a work desk, the tee folded in a travel bag. A real moment sells more than an isolated shot.
Editing basics
Editing polishes the photo, it does not change it. The goal is for the photo to match the real product exactly, because any exaggeration means returns and complaints.
- Adjust brightness and contrast lightly. Lift the exposure so the photo is clean and bright without blowing out the detail.
- Correct the color balance. Make white look white and colors true to life. This is the most important step, because a wrong product color loses trust.
- Crop to a single ratio. Use one crop ratio for every photo (square, for example) so the store page looks tidy.
Specific tips for apparel and merch
Shooting apparel has its own challenges: wrinkles, fit, and color matching. A little attention makes a big difference on a product page that sells.
- Iron or steam the piece before shooting. Wrinkles are what make clothing look cheap in photos more than anything else.
- Show the print up close. A close-up of the design and fabric reassures the customer about quality, especially for print on demand products.
- Shoot every available color. Do not shoot one color and change it digitally, because the customer wants to see the real color they will receive.
- Show sizes and details. Photograph the collar, sleeves, stitching, and size tag. These shots reduce questions and returns.
Consistency is what builds trust
Once you master the basics, the most important rule is consistency. Pick one background, one distance, one angle, and one editing style, and hold to it across every product. A store page with consistent photos looks professional and organized, and it builds trust before the customer reads a word. Write down your settings, the window light, the phone height, and the crop ratio, and repeat them in every shoot. When your photos are consistent, it is time to get them in front of people through marketing your store.
The bottom line
Product photography with a phone does not need expensive gear. It needs natural window light, a clean neutral background, a steady phone, and varied angles. Combine flat-lays for detail with on-model shots for fit, style with a few simple elements, and edit lightly so the photo matches the real product. With apparel, iron the piece and show the print and every color. Above all, keep your store consistent, because that is what builds trust and sells. With just your phone, you get professional photos that turn a visitor into a buyer.
Frequently asked questions
- Can I shoot professional product photos with just a phone?
- Yes. Modern phone cameras are more than enough for professional store photos. The real difference comes from good window light, a clean background, and keeping the phone steady, not from the price of the camera.
- What is the best light for phone product photography?
- Natural daylight from a side window is the best and cheapest option. Shoot near the window on a slightly overcast day or in the morning, and avoid harsh direct sun and yellow ceiling lights.
- Flat-lay or on-model: which is better?
- Both serve a different purpose. Flat-lays show product detail and print clearly and are easy to keep consistent, while on-model shots show fit and how the piece looks on the body. The best approach is to use both for each product.
- How do I keep my store photos consistent?
- Lock one background, one shooting distance, one angle, and one editing style across every product. Consistency makes your store page look organized and professional, and builds customer trust instantly.
- Do I need paid editing apps?
- No. Free apps like your built-in gallery editor, Snapseed, or the free Lightroom are enough to fix brightness, color balance, and cropping. Keep edits light and realistic so the real product does not surprise the customer.